- Published on
Using Angular 7 Custom Elements in a Spring Boot Application
- Authors

- Name
- Code Smarter
- @codesmarter_dev
Spring Boot is becoming increasingly popular for developing and configuring Spring-based applications. For its part, Angular is establishing itself as one of the most popular JavaScript frameworks.
It is therefore very useful to combine the two to create powerful applications. In this context, I'll show you how to use one of Angular's features, Angular Elements, and integrate it into your Spring Boot application.
Creating the Project with Spring Initializr
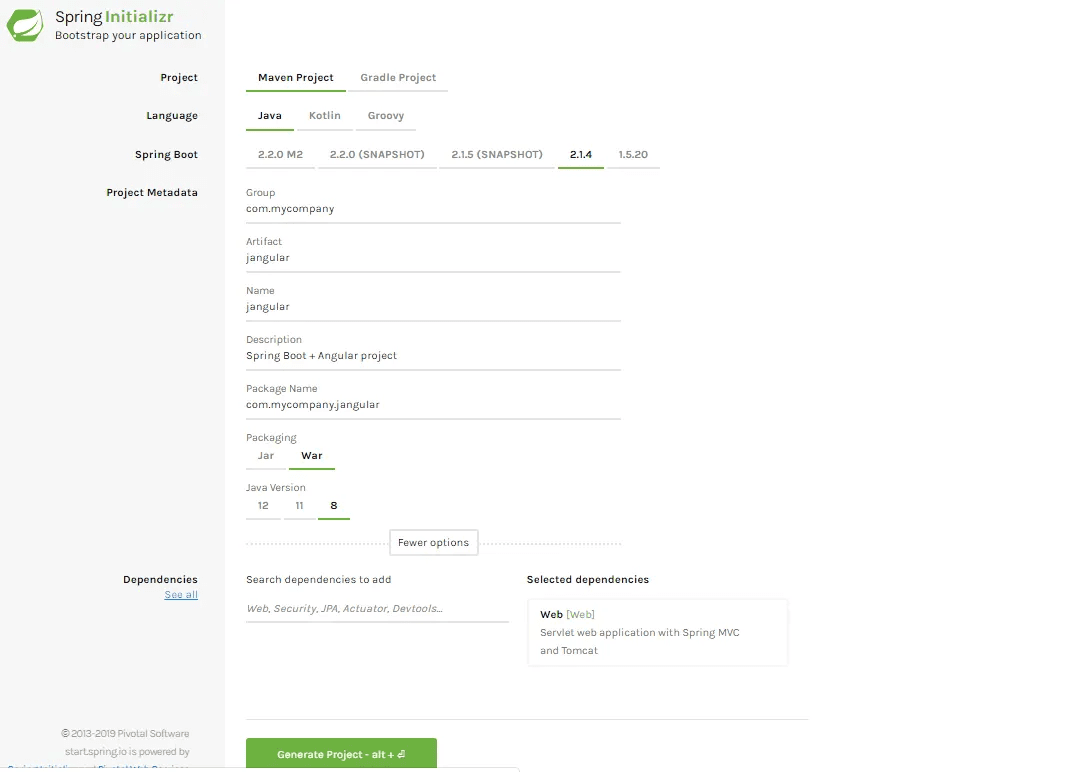
Spring Initializr is a tool that allows you to quickly generate Spring Boot projects and add default configurations.
Let's create our project:
Choose:
- Project: Maven Project
- Language: Java
- Spring Boot: (latest stable version)
- Dependencies: Spring Web, Thymeleaf (optional), and any other necessary dependencies
Then, click Generate to upload the project.
Next Step
Generating the Maven Project with Spring Boot
In the screenshot above, we simply state: "I want you to generate the structure of a Maven project with Java and Spring Boot."
Choosing Dependencies
In the Dependencies section, you can select the packages you need. In our case, the only dependency needed for now is Web.
By choosing this dependency, we add the spring-boot-starter-web package, which is the starter for building web applications (including RESTful ones) with Spring MVC.
This starter also includes Tomcat, via the spring-boot-starter-tomcat package, which is used as the default servlet container.
Project Generation
By clicking Generate Project, a .zip file will be downloaded, containing our application ready to be imported.
Import and Configuration
After importing the project into your IDE:
- Open the application.properties file
- Change the default port of the web application to avoid conflicts with another application using the same port.
server.port line= 8181

The view is not yet defined
It's normal for the URL to display an error because no view has yet been defined.
Add a web endpoint
We created our Spring Boot application by specifying that we wanted a WAR package.
To be able to deploy this WAR later and display web content, you need to create a webapp folder in src/main.
Spring MVC uses the built-in Tomcat to run applications. During deployment, Tomcat looks for the index.html file in src/main/webapp.
Step 1 – Create index.html
Create an index.html file in src/main/webapp with a simple message:
<!DOCTYPE html>
<html lang="en">
  <head>
    <meta charset="UTF-8" />
    <title>Home</title>
  </head>
  <body>
    <h1>Welcome to the site!</h1>
  </body>
</html>
After restarting the application, the following URL will display the message:
http://localhost:8181/
Create the Angular Application
We will use Angular CLI to create our Angular application. Angular CLI is a command-line interface that allows you to generate a structured project and initialize dependencies and interconnections between different modules.
Prerequisites
To use Angular CLI, you must install Node.js. npm is the package manager included with Node.js.
Example of installed versions:
Node.js v11.8.0
npm 6.5.0
Angular CLI 7.3.1
Step 2 – Create the Angular project
To avoid creating a new folder, you can use the webapp directory where the index.html file is already located.
Open a terminal, navigate to the src/main folder, and run the command:
ng new webapp
Do not add the routing or CSS yet. You can do this later if you want to develop the application further.
Project Hierarchy
After this step, you should have the following hierarchy: