
- Published on
Creating a REST application with Spring Boot and Oracle running in Docker
- Authors

- Name
- Code Smarter
- @codesmarter_dev
As a full-stack developer, combining Java and Angular to build an application is very useful for improving your knowledge of backend and frontend software and tools.
In this step, you will learn how to create a REST application with Spring Boot. In the following steps, you will see how to secure it (with JWT tokens) and add cache management (with Hazelcast). Finally, you'll learn how to connect Angular to your REST application.
1. Tools
- Java 13
- Spring Tool Suite (STS)
- Oracle 12c
- Docker
- Postman
Create a Spring Boot Project
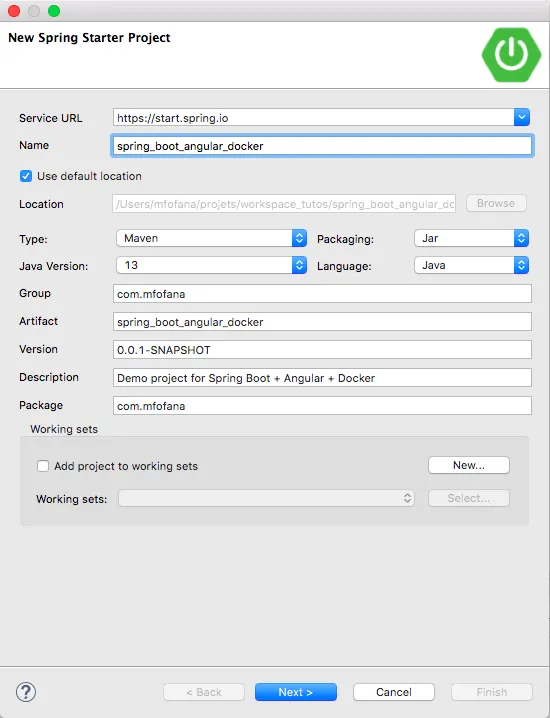
Open your STS editor and create a new project.

Add these starter modules. These will allow us to get our project up and running quickly, without having to do much configuration.

Click to complete the build.
At this point, the project tree should look like this:

Spring Starter
The Spring Starter allows you to add multiple dependencies in a single package and avoid conflicts.
spring-boot-starter-parent
Every Spring Boot project built with Maven uses spring-boot-starter-parent in its pom.xml. Some of its actions:
- Configures the Java version and properties
- Manages dependencies and their versions
- Configures the default plugin
spring-boot-starter-web
To implement a REST service, we need to add libraries for JSON, Tomcat, Spring MVC, and more. This module groups all these dependencies.
spring-boot-starter-data-jpa
This starter contains the dependencies needed to persist data to a SQL database via JPA with Spring Data and Hibernate.
spring-boot-starter-test
It is used to test Spring Boot applications with libraries such as JUnit, Hamcrest, or Mockito.
Add the ojdbc6 dependency and repository
This is the driver for Oracle connections. You need this dependency for spring-boot-starter-data-jpa to work properly.
pom.xml Example
Your pom.xml file should look like this:
<?xml version="1.0" encoding="UTF-8"?>
<project xmlns="http://maven.apache.org/POM/4.0.0" xmlns:xsi="http://www.w3.org/2001/XMLSchema-instance"
	xsi:schemaLocation="http://maven.apache.org/POM/4.0.0 https://maven.apache.org/xsd/maven-4.0.0.xsd">
	<modelVersion>4.0.0</modelVersion>
	<parent>
		<groupId>org.springframework.boot</groupId>
		<artifactId>spring-boot-starter-parent</artifactId>
		<version>2.2.5.RELEASE</version>
		<relativePath/> <!-- lookup parent from repository -->
	</parent>
	<groupId>com.group</groupId>
	<artifactId>spring_boot_angular_docker</artifactId>
	<version>0.0.1-SNAPSHOT</version>
	<name>spring_boot_angular_docker</name>
	<description>Demo project for Spring Boot + Angular + Docker</description>

	<properties>
		<java.version>13</java.version>
<!-- 		Downgrade maven jar plugin version to avoid Maven Plugin Configuration Error  -->
<!-- 		https://stackoverflow.com/questions/56212981/eclipse-showing-maven-configuration-problem-unknown  -->
		<maven-jar-plugin.version>3.1.1</maven-jar-plugin.version>
	</properties>

	<dependencies>
		<dependency>
			<groupId>org.springframework.boot</groupId>
			<artifactId>spring-boot-starter-data-jpa</artifactId>
		</dependency>
		<dependency>
			<groupId>org.springframework.boot</groupId>
			<artifactId>spring-boot-starter-web</artifactId>
		</dependency>
		<dependency>
			<groupId>com.oracle</groupId>
			<artifactId>ojdbc6</artifactId>
			<version>11.2.0.3</version>
		</dependency>

		<dependency>
			<groupId>org.springframework.boot</groupId>
			<artifactId>spring-boot-starter-test</artifactId>
			<scope>test</scope>
			<exclusions>
				<exclusion>
					<groupId>org.junit.vintage</groupId>
					<artifactId>junit-vintage-engine</artifactId>
				</exclusion>
			</exclusions>
		</dependency>
	</dependencies>

	<repositories>

		<!-- Repository for ORACLE JDBC Driver -->
		<repository>
			<id>codelds</id>
			<url>https://code.lds.org/nexus/content/groups/main-repo</url>
		</repository>

	</repositories>

	<build>
		<plugins>
			<plugin>
				<groupId>org.springframework.boot</groupId>
				<artifactId>spring-boot-maven-plugin</artifactId>
			</plugin>
		</plugins>
	</build>

</project>
Representation Class
Create the Employee class
Create the Employee class containing the employee's information:
- Technical ID
- First Name
- Last Name
- Address
- Postal Code
- City
- Country
import javax.persistence.Entity;
import javax.persistence.Id;
import javax.persistence.Table;
import javax.validation.constraints.NotBlank;

@Entity
@Table(name="employee")
public class Employee {
	@Id
	private Long id;
	@NotBlank
	private String firstname;
	@NotBlank
	private String lastname;
	private String address;
	private String zipcode;
	private String city;
	private String country;

	public Long getId() {
		return id;
	}
	public void setId(Long id) {
		this.id = id;
	}
	public String getFirstname() {
		return firstname;
	}
	public void setFirstname(String firstname) {
		this.firstname = firstname;
	}
	public String getLastname() {
		return lastname;
	}
	public void setLastname(String lastname) {
		this.lastname = lastname;
	}
	public String getAddress() {
		return address;
	}
	public void setAddress(String address) {
		this.address = address;
	}
	public String getZipcode() {
		return zipcode;
	}
	public void setZipcode(String zipcode) {
		this.zipcode = zipcode;
	}
	public String getCity() {
		return city;
	}
	public void setCity(String city) {
		this.city = city;
	}
	public String getCountry() {
		return country;
	}
	public void setCountry(String country) {
		this.country = country;
	}
}
JPA Repository
It contains the usual CRUD methods and others to handle basic operations. So, to create our own repository, we need to extend Spring Data JPA Repository.
import org.springframework.data.jpa.repository.JpaRepository;
import org.springframework.stereotype.Repository;

import com.mfofana.kodakro.model.Employee;

@Repository
public interface EmployeeRepository extends JpaRepository<Employee, Long>{

}
Exception
Create an exception that will be thrown when a resource is not found on the server.
import org.springframework.http.HttpStatus;
import org.springframework.web.bind.annotation.ResponseStatus;

@ResponseStatus(value = HttpStatus.NOT_FOUND)
public class ResourceNotFoundException extends RuntimeException {
	private static final long serialVersionUID = 1L;
	private String resourceName;
    private String fieldName;
    private Object fieldValue;

    public ResourceNotFoundException( String resourceName, String fieldName, Object fieldValue) {
        super(String.format("%s not found, %s= %s", resourceName, fieldName, fieldValue));
        this.resourceName = resourceName;
        this.fieldName = fieldName;
        this.fieldValue = fieldValue;
    }

    public String getResourceName() {
        return resourceName;
    }

    public String getFieldName() {
        return fieldName;
    }

    public Object getFieldValue() {
        return fieldValue;
    }
}
Controller
Create the controller that will be used to interact with employees and perform CRUD actions.
import java.util.List;

import javax.validation.Valid;

import org.springframework.beans.factory.annotation.Autowired;
import org.springframework.http.MediaType;
import org.springframework.http.ResponseEntity;
import org.springframework.web.bind.annotation.DeleteMapping;
import org.springframework.web.bind.annotation.GetMapping;
import org.springframework.web.bind.annotation.PathVariable;
import org.springframework.web.bind.annotation.PostMapping;
import org.springframework.web.bind.annotation.PutMapping;
import org.springframework.web.bind.annotation.RequestBody;
import org.springframework.web.bind.annotation.RequestMapping;
import org.springframework.web.bind.annotation.RestController;

import com.mfofana.kodakro.exception.ResourceNotFoundException;
import com.mfofana.kodakro.model.Employee;
import com.mfofana.kodakro.repository.EmployeeRepository;

@RestController
@RequestMapping(path = "/api/employee", produces = MediaType.APPLICATION_JSON_VALUE)
public class EmployeeController {
	@Autowired
	EmployeeRepository employeeRepository;


	@PostMapping("/")
	public Employee postEmployee(@Valid @RequestBody Employee employee){
		return employeeRepository.saveAndFlush(employee);
	}

	@GetMapping("/all")
	public List<Employee> getEmployees(){
		return employeeRepository.findAll();
	}

	@GetMapping("/{id}")
	public Employee getEmployeeById(@PathVariable("id") Long id){
		Employee employee= employeeRepository.findById(id).orElseThrow(() -> new ResourceNotFoundException("Employee", "id", id));
		return employee;
	}

	@DeleteMapping("/{id}")
	public ResponseEntity<?>  deleteEmployee(@PathVariable("id") Long id){
		employeeRepository.deleteById(id);
		return ResponseEntity.ok().build();
	}

	@PutMapping("/{id}/address")
	public Employee updateEmployee(@PathVariable("id") Long id, @Valid @RequestBody Employee employee){
		Employee dbEmployee =  employeeRepository.findById(id).orElseThrow(() -> new ResourceNotFoundException("Employee", "id", id));
		dbEmployee.setAddress(employee.getAddress());
		dbEmployee.setZipcode(employee.getZipcode());
		dbEmployee.setCity(employee.getCity());
		dbEmployee.setCountry(employee.getCountry());
		return employeeRepository.save(dbEmployee);
	}
}
Update app properties
Edit the following file:
server.port=8181

# Oracle settings
spring.datasource.driver-class-name=oracle.jdbc.driver.OracleDriver
spring.datasource.url=jdbc:oracle:thin:@localhost:1521:xe
spring.datasource.username=my_username
spring.datasource.password=my_password

## Hibernate Properties
# The SQL dialect makes Hibernate generate better SQL for the chosen database
spring.jpa.properties.hibernate.dialect = org.hibernate.dialect.Oracle12cDialect

# logging
logging.pattern.console=%d{yyyy-MM-dd HH:mm:ss} %-5level %logger{36} - %msg%n
logging.level.org.hibernate.SQL=debug
Database
You can find the procedure for installing Oracle Database on Mac with Docker here.
Once the installation is complete, you can run this script to create the Employee table and insert data:
CREATE TABLE EMPLOYEE(
ID INTEGER NOT NULL,
FIRSTNAME VARCHAR2(50) NOT NULL,
LASTNAME VARCHAR2(50) NOT NULL,
ADDRESS VARCHAR2(150),
ZIPCODE VARCHAR2(5),
CITY VARCHAR2(50),
COUNTRY VARCHAR2(50),
CONSTRAINT PK_EMPLOYEE PRIMARY KEY (ID)
);
INSERT INTO EMPLOYEE VALUES (1, 'David', 'JOHNSON', '8456 West Pacific Road', '15601', 'Greensburg', 'United States of America');
INSERT INTO EMPLOYEE VALUES (2, 'Larry', 'HOLMES', '9604 Goldfield Avenue', '38501', 'Cookeville', 'United States of America');
Project Tree

Test with Postman
Start the Spring Boot application and then open Postman.
You can import the file below into Postman to configure the tests.
{
  "info": {
    "_postman_id": "9b656ea1-22a3-4a93-9d57-60cbd649e805",
    "name": "Employee",
    "schema": "https://schema.getpostman.com/json/collection/v2.0.0/collection.json"
  },
  "item": [
    {
      "name": "create",
      "request": {
        "method": "POST",
        "header": [
          {
            "key": "Content-Type",
            "value": "application/json",
            "type": "text"
          }
        ],
        "body": {
          "mode": "raw",
          "raw": "\t{\n        \"id\": 3,\n        \"firstname\": \"Naomi\",\n        \"lastname\": \"BANKS\",\n        \"address\": \"8335 Bridle Dr.\",\n        \"zipcode\": \"21144\",\n        \"city\": \"Severn\",\n        \"country\": \"United States of America\"\n    }"
        },
        "url": "http://localhost:8181/api/employee/"
      },
      "response": []
    },
    {
      "name": "readAll",
      "request": {
        "method": "GET",
        "header": [],
        "url": "http://localhost:8181/api/employee/all"
      },
      "response": []
    },
    {
      "name": "updateAddress",
      "request": {
        "method": "PUT",
        "header": [
          {
            "key": "Content-Type",
            "value": "application/json",
            "type": "text"
          }
        ],
        "body": {
          "mode": "raw",
          "raw": "\t{\n        \"id\": 3,\n        \"firstname\": \"Naomiii\",\n        \"lastname\": \"BANKS\",\n        \"address\": \"8335 Bridle Dr.zzzz\",\n        \"zipcode\": \"0044\",\n        \"city\": \"Severnooo\",\n        \"country\": \"United States of Americaaaaa\"\n    }"
        },
        "url": "http://localhost:8181/api/employee/3/address"
      },
      "response": []
    },
    {
      "name": "delete",
      "request": {
        "method": "DELETE",
        "header": [],
        "url": "http://localhost:8181/api/employee/3"
      },
      "response": []
    },
    {
      "name": "readOne",
      "request": {
        "method": "GET",
        "header": [],
        "url": "http://localhost:8181/api/employee/2"
      },
      "response": []
    }
  ]
}

GET URLs can also be called directly from the browser.
Example: http://localhost:8181/api/employee/all

Conclusion
In this article, we built a REST application with basic services. In the next step, we'll see how to add security and cache management to the Spring Boot application using Spring Security, JWT tokens, and Hazelcast.